NoWire w/WebConnect Offline Troubleshooting Guide
Troubleshooting NoWire Meter Reading Issues: A Complete Guide
If you're experiencing issues with your NoWire system—such as meters showing no readings, intermittent connectivity, or a gateway that appears offline—know that you're not alone. Many users with long-standing NoWire installations have encountered similar challenges. These problems often stem from outdated hardware, network configuration issues, or gateway connectivity failures. This guide walks you through the most common causes and proven solutions to restore full functionality to your NoWire system.
Gateway Offline: The Root of the Problem
One of the most frequent causes of missing meter readings is an offline gateway. In a recent case, a customer reported that several meters were not transmitting data. Upon investigation, it was confirmed that the NoWire gateway had gone offline. This is a critical first step in troubleshooting: always verify the gateway status through the NoWire portal (MeterData).
When the gateway is offline, no data can be transferred to MeterData. The first action is to physically inspect the gateway. Ensure it is securely plugged into a working power outlet and that the power indicator light is on. A flickering or absent light may indicate a power supply issue.
Next, confirm that the gateway is connected to your Wi-Fi network. Even if the device appears powered on, it may not be successfully communicating with your router. The gateway relies on a stable Wi-Fi connection to send data to MeterData. If the Wi-Fi signal is weak or the network settings have changed, the gateway may lose connection.
Reconfiguring Wi-Fi Settings on the NoWire Gateway
If the gateway is powered but still offline, the issue may lie in incorrect or outdated Wi-Fi credentials. The NoWire gateway allows users to reconfigure its network settings directly through its built-in menu system. To do this, access the device’s menu using the physical buttons on the unit.
A helpful instructional video is available to guide users through the process of setting up or resetting the Wi-Fi connection. This video walks you through navigating the menu, selecting the Wi-Fi configuration option, and entering your current network name (SSID) and password. It’s important to ensure that the Wi-Fi network is a 2.4 GHz band, as the NoWire gateway does not support 5 GHz networks.
NoWire Instructional Series - Wifi Configuration
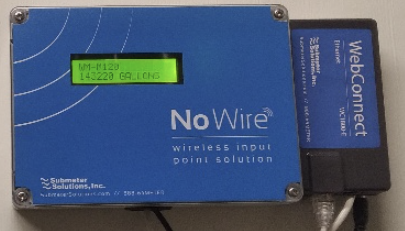
If you’re unable to access the Wi-Fi settings or the gateway fails to connect after reconfiguration, the problem may not be software-related. In such cases, the WebConnect device—responsible for managing the gateway’s network communication—could be malfunctioning.
Hardware Limitations and the Need for an Upgrade Path
The WebConnect device, which acts as the communication bridge between the gateway and your network, may have reached the end of its operational life. Over time, internal components can fail due to heat, power fluctuations, or wear and tear.
If repeated attempts to reconnect the gateway fail, and you’ve confirmed that the power and Wi-Fi are functioning correctly, the WebConnect device may need to be replaced. Fortunately, Pioneer Energy Management offers an upgrade pathway for older systems. This includes updated gateway hardware and compatibility with modern network standards, ensuring long-term reliability and improved data transmission.
The upgrade process is straightforward and supported by technical teams who can guide you through the transition. This is especially recommended for users who have experienced persistent connectivity issues despite proper configuration.
Final Steps and Support
If, after following all recommended steps, your NoWire system remains offline or continues to miss meter readings, contact Pioneer Energy Management support. Provide details such as the name of your property as it appears within MeterData, the list of affected meters, and any error messages from the portal (if possible). This information helps support teams diagnose the issue more efficiently.
Remember, even older systems can be restored to full functionality with the right troubleshooting steps and, if needed, a hardware upgrade. The NoWire has gone through several upgrade iterations since this model and has since been "sunsetted" as a product as there are more advanced systems with better features on the market.
Please inform us if you would like to gain more information about upgrading your existing metering system.
Related Articles
NoWire System - System Offline
NoWire Troubleshooting System Offline OVERVIEW: NoWire 1100 Series The NoWire 1100 series was the earliest iteration of the NoWire product line. It was sold with 3 variations depending on the method in which you were to connect the device to the ...NoWire System - Transmitter(s) Offline
NoWire Troubleshooting Offline Transmitter(s) OVERVIEW: The NoWire utilizes the Inovonics EN1501 transmitter. This device does not have 2-Way communication like that of Tehama or Next Century, so troubleshooting requires access to the NoWire unit, ...Understanding Status Codes for NoWire
Understanding Status Codes for NoWire Overview In wireless transmitter systems, various status codes are used to indicate specific conditions or alerts. Understanding these codes is crucial for effective monitoring, maintenance, and troubleshooting ...NoWire System - No Consumption
NoWire Troubleshooting No Consumption OVERVIEW: For non-advancing meters, the first step would be to do a bucket test. This will test the meter itself for accuracy as well as the pulse output capabilities: Before getting started, verify the status of ...NoWire System - Adding New Addition Transmitter
NoWire Programming New Transmitters Fig. A: NoWire 2100 Faceplate Remove the front faceplate from the unit using the 4 screws located in all 4 corners. You should see the three buttons next to the display labeled: Back, Next and Change. You will be ...